Learning linocutting: it’s safe to say it’s harder than it looks! After watching countless videos on YouTube and seeing various artists make it look stress-free and easy, I decided I wanted to give lino printing a shot. There’s something about carving and printing that seems very therapeutic, a good break from digital art and staring at my iPad screen for hours.
With this being a new hobby, I was unsure whether I would actually like it or if it was just a new fad that I’d start and give up after a few weeks. Because of that, I was reluctant to go all-in and buy masses of equipment before I’d even started learning linocutting; my goal was to start as cheaply as possible.
Linocut Starter Kit
To get started, I bought the basics I’d need to learn linocutting. I picked up an Essdee Linocut Starter Kit from Hobbycraft, which includes everything you need to get going: a lino handle with two interchangeable cutters for different carving sizes, two Softcut blocks (5.9 x 3.9 inches), a small 45mm ink roller, and some black block printing ink (100ml).
At the time of writing, the kit is £17.99. It felt like a great way to start without having to buy everything separately, which ended up being way more expensive. You can find the link to the set here.
All you need to get started learning linocutting:
- Cutting Tool: A handle with interchangeable blades for different line thicknesses.
- Printing Ink: I started with standard black.
- Lino Blocks: I used the “Softcut” version
How it went… 😬
For a first-timer, the kit was great! It really does have everything a beginner needs to get started learning linocutting.
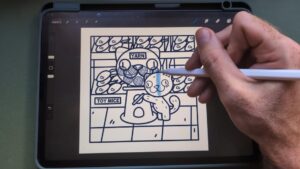
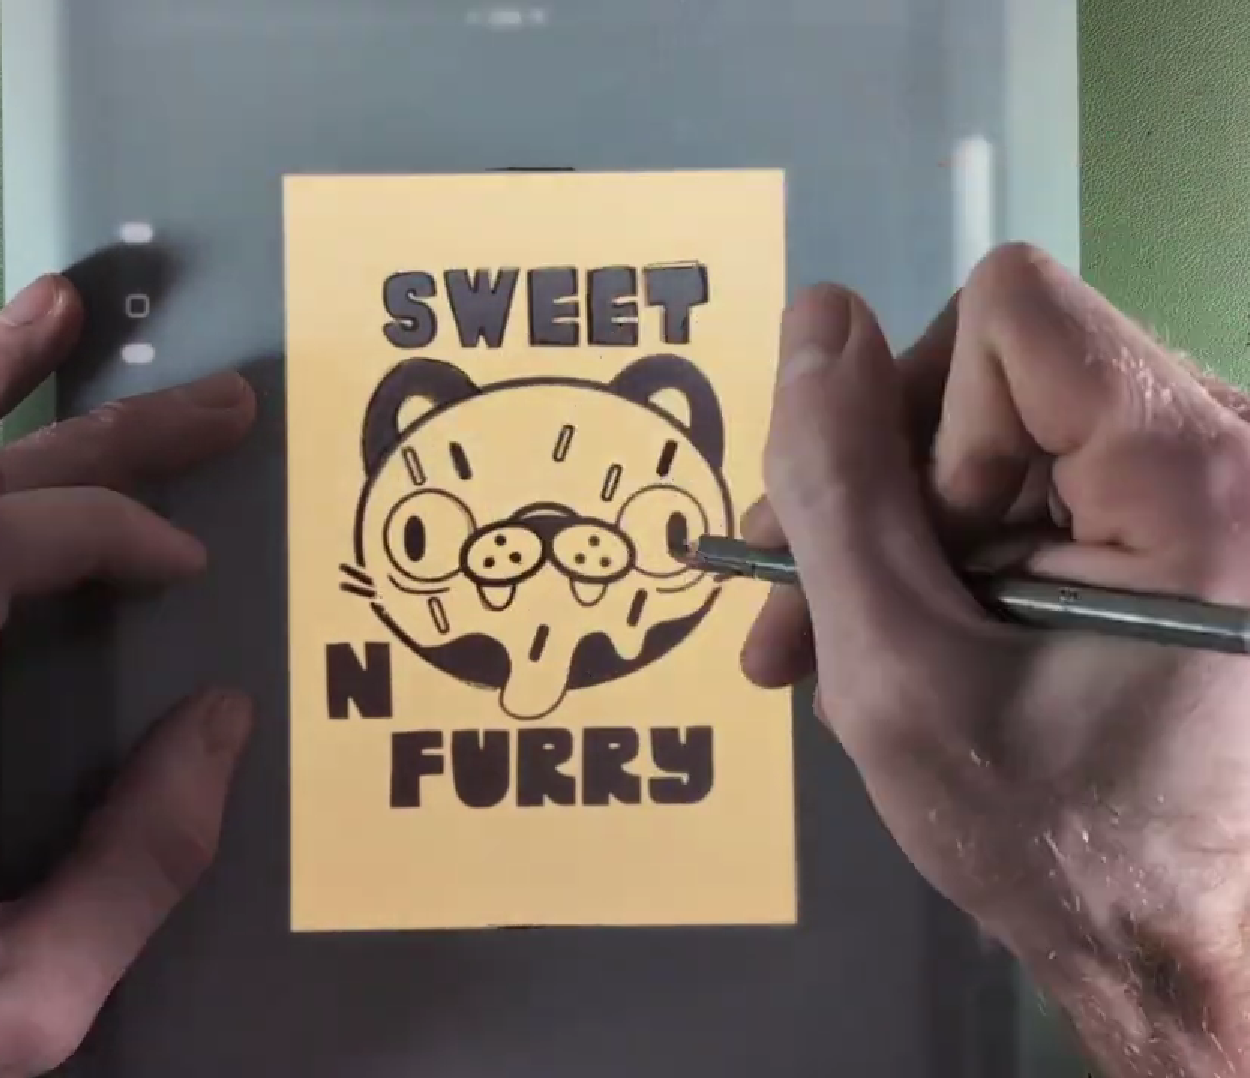
I drew my design on Procreate first, then placed tracing paper over the top to redraw it. Honestly, I found this part really painful. You’re basically redrawing the entire image all over again, and it was hard to get it exactly how I had it on the iPad. This meant that by the time I transferred it, it already wasn’t going to look quite the same.
Once the tracing was done, I flipped it over onto the lino block and scribbled over the back to transfer the image. That part actually worked well! 🐾
The Carving Struggle
Once the transfer was over (which to me is the worst part), you can finally start carving. It’s definitely hard to get your bearings right off the bat—knowing how much pressure to apply, how to curve around the image without taking too much off, and even seeing what you’ve already carved. It’s so easy to miss spots!
I’ve seen a lot of people coloring their blocks beforehand so that the carved layer shows up as a different color, making it much easier to see. That’s definitely something I’ll have to remember to do next time.
Carving also takes a massive amount of patience, especially around intricate shapes like the text in my design. One thing I’ve already learned: if you rush it, it’s going to look rushed. Once the carving was finished, I just used a pair of scissors to cut away the excess lino from around the image.
The Inking Disaster
The next part was probably the hardest for me: rolling out and applying the ink evenly. There is so much skill to this, and I have a newfound appreciation for the artists who make it look easy!
I used an old piece of glass from a picture frame to roll the ink out. It’s not as simple as just adding ink and rolling; getting a consistent application on the roller is tough. As a beginner, it’s hard to know what you’re even looking for, and I know this is going to take a lot of trial and error until I “just know.”
Once the ink was on the block, it looked even to me, but I can assure you, it did not come out that way. I placed it onto a piece of paper and applied pressure. The result? An absolute mess of ink. It only vaguely resembled my Procreate drawing. This is where I realised I probably need a proper brayer to get consistent pressure across the print, which unfortunately wasn’t included in the starter kit.
Summary & what I learned linocutting💡
Linocutting is definitely a skill, and it’s nowhere near as easy as it looks! It’s going to take a lot of practice to get the application right, especially the inking. I expect the learning curve for carving to come a bit quicker, but I can already tell that mastering the ink is going to take some serious work.
My biggest takeaways from Attempt 1:
- Consistency is key: Getting even ink coverage is everything.
- Rolling technique: I need to work on how I roll the ink out before it even touches the block.
- The right tools: Applying consistent pressure across the print is hard without the proper tools (like a brayer or barren).
It was a messy start, but I’m ready for ‘Learning Linocutting: Attempt 2!
You can check out all my linocutting blogs here.